Skip to content
Image

We’ve Moved!!

Moved!

Say Hello to Hollybeary!

Im so excited to share our next addition to DCC….Holly Endress!!
www.hollybeary.com

You’re going to love her art!!
Here’s one of her post about classes she teaches in PA. If you’re in the area…go!!
Check out this post and head on over to her website to see what else she has to offer.
You’ll be blown away!

Card Class Projects.

I do a card class at our local library once a month and last month we created these 3 cards.. I’m still playing catch up with my post..lol If you’re in the Potter Co. PA area or the Norther Tier as it’s called and are interested in classes please contact me and I’ll send you the info.
This first card using the set Field Flowers.. I CASE’d it from Pinterest from Amy O’Neil. I changed up the colors and the ribbon. I love how the Flowers are popped up! We sponged some Tempting Turquoise ink lightly behind the flowers. The flowers are Crushed Curry, Old Olive & Tangerine Tango.
This is a new set from the new Stampin’ Up! Catalog that just started.. I think this will be a favorite of everyone! It’s called a Work of Art.
I started with a color combo from my Color Coach.. Rose Red, Marina Mist & Soft Suede. I stamped the images onto the lower right side of a Whisper White panel and then I adhered that to a Rose Red card base. I stamped the heart onto a separate piece of scrap and fussy cut it along with the THANK sentiment. The You is stamped in Momento ink.  I added a few sequins from Pretty Pink Posh and a rhinestone.
Our final card showcases the Silhouette and My Digital Studio.. Which is a great crafting combo!
I have a ton of this Sweet Sorbet DSP left from Sale-A-bration so I thought it’d be fun to create a card with the different designs. I punched the circles out in different sizes and layered them onto the card. Then Using the Silhouette and then Moments Ago SVG file from MDS. I cut several of the Hello’s from Summer Starfruit. These pastel green sequins from Pretty Pink Posh matched Pistachio Pudding perfectly.
Thanks for stopping by.. I hope you’re having a great weekend so far!

Say Hello to our new friend…Tina Henderson!

Hello Hello to Tina!!
She is from Tina’s Creative Place and shes’ also new to DCC!
Take a look at her awesome skills.
This post is from her blog and she entered it to one of our favorite card challenges!
Charisma Cardz!!

Check her out and give her a follow!

Good morning!  Today starts a new challenge at Charisma Cardz!  This week our theme is Father’s Day.  I decided to make a card using my Cricut.  It seems I don’t get it out near as much as I should anymore.  I cut my letters using the font that came with the Expressions II and the stars were cut using a Sizzix die.
We have some wonderful sponsors this week.  Bunny Zoe’s Crafts, All Dressed Up Stamps and Ditzie DigiDesigns.  So
 what are you waiting for?  Hop on over to Charisma Cardz  
and enter your Father’s Day card today!
I am entering my card into the following challenges:
Thanks for stopping by! I hope to see you again soon.

Meet Julia and Welcome Her to DCC!

Here’s another new member of the DCC Family!!
Say hello to Julia Klein from
mimizukudesign.blogspot.de

She is fabulous and you will love what she has to share with you.
Make sure and hit the ‘translate’ tab on the right hand side if you need it.
You won’t want to miss what she has to say.

Here’s a sneak peak at what you can expect.

Today I distribute a round of love to all! 🙂 This card here is the first successful attempt was to sew on paper. I have it on Instagram shown and get so much positive feedback that I have just left like that. They are decorated by a place of honor in my Scrapzimmer. I like the colors so much, you too?

Yes, and the theme of love. A few days ago I’ve got my layout “love yourself” as shown and also written a little something personal to. Since a node has burst with me somehow. 🙂 I have so much fun scrapbooking, as with any other creative work I’ve done so far. Can you believe that? In January, still I never thought I would describe myself as a scrapbooker times. And now I feel so sauwohl. To properly.
In the last week is a tremendous amount going on in the way, but I must first of all have to collect a total of a little. That is why there is to it at a later date an extra post! 🙂

It feels so wonderful to have arrived to have that feeling. I have released a lot of old things and feel free so extreme. You know the feeling? And the wonderful thing is that I am now ready and open to new ideas. My notebook is overflowing, my online shopping cart filled, unfortunately, again and again and I can not wait to welcome the new weekend and realize a few ideas. In this sense: LOVE YOURSELF! 🙂
Have a great start to the weekend! xo Julia

Welcome Karen to DCC!

Hello Everyone!
We have added some new contributors to our team and I’d like to introduce you to one now!

Karen Hasheck is from Karens Kreative Kards! 

Make sure and check out her blog and become a follower. She’d love it if you did! 🙂
Here’s one of her posts about DCC!


Celebrating a New Adventure

I am so excited to share that I am now a monthly contributor at an on-line digital magazine called Die Cut Crazy. This is the card that was published in the June issue available right now on iTunes for iPad and iPhone owners. (If you do not have an iPad or iPhone, there is going to be a PDF version available very soon.) I just received my copy of the issue and I am blown away! 53 Pages of Die Cut Awesomeness! 11 articles with great cards, techniques, reviews, etc. I am so making some of these cards! There is page after page of reader cards that can be submitted via Instagram or email. There is a monthly challenge and if you enter, your card will be published! The theme is Jewelry- Diamonds, Engagement & Wedding, Tiaras.  So if you ever wanted to get your cards published in a magazine, this is your perfect opportunity! One month subscription (that renews automatically until you cancel it in iTunes) is only 99 cents!!  There are even better deals if you buy a year’s subscription. Here is a link to the subscription details:  https://itunes.apple.com/us/app/die-cut-crazy-mag/id590620928?mt=8.

Between Memorial Day, Flag Day and 4th of July, I have been feeling patriotic lately, so I was inspired to make this Stars and Stripes Shaker Card. I stamped the stars (Kitchen Sink Stamps) on a white piece, then embossed it with a stripes embossing folder (Stampin’ Up) inked with red ink. I created the star shaker with star Nestabilities dies, acetate, and various sequins. I finished the card with a few more star sequins and small red gems.

I am entering this card in the Anything Goes challenges at Crafty Sentiments Designs and Papertake Weekly (summer is the optional challenge and what is more summer than red, white and blue for 4th of July?)

New Stamping Technique from Anna!

I understand that this is NOT ‘Die Cut’ but how many of you love to stamp?
Anna Bradshaw has a great tip for you!!
Make a stop by and say hello to Anna!
craftwithanna.blogspot.com


Hi there stampers! My apologies if you stopped by here before and there was no text for this awesome new stamping technique, but let me tell you , it is super easy and the effect isawesome!
Simply lay a piece of washi or painter’s tape across the paper you plan to stamp on. I used a couple sizes of flower stamps, but was thinking this could be really cute with some stars or firework-like shapes for the fourth of July coming up.
Randomly stamp around and over the top of the tape with an ink that dries fast, or thoroughly heat set your pigment ink. Carefully peel off the tape and you have a cool blank stripe going through your design!
The example I watched on YouTube was stamped with black ink on black paper. Hmm, you’re right, it just barely shows. But, it shows enough that you could trace over the top with your colored pencils of choice for a really sketchy look. I decided to use dark red ink on purple paper for a more feminine look. I still filled in the flowers with watercolor pencils and I love the vibrancy of the color.
Embossing Powder shows off your Sentiment
A simple sentiment stamp down the center, embossed with either clear or otherwise colored embossing powder brings a bit more sparkle to the card. It would have been cute to add some tiny sparkles as well, either to the centers of the little flowers or even surrounding them in some of the emptier looking spaces.
 For a little drama, and to help hide the fact that as usual, I miscut my paper and it doesn’t line up perfectly with my card base, I added my rhinestones to the bottom right corner of the card, overlapping the focal piece and the background.
Now, go back with a ruler and run your colored pencil along the edge of the masked area to finish it off. Pretty, AND Awesome!

Debbie O’Neal…the Queen of Die Cuts!

Debbie O’Neal is part of the DCC family. Have you checked out her website? www.scrapmequickdesigns.com
She has some AWESOME die cut information. I like to call her the “Die Cut Queen!” Here’s one of her latest post.
Make sure and hop on over to her site and see all the other great stuff she has been working on.
You can also find her on Facebook!

CHECK HER OUT!! 

ce ipad app  cover photo

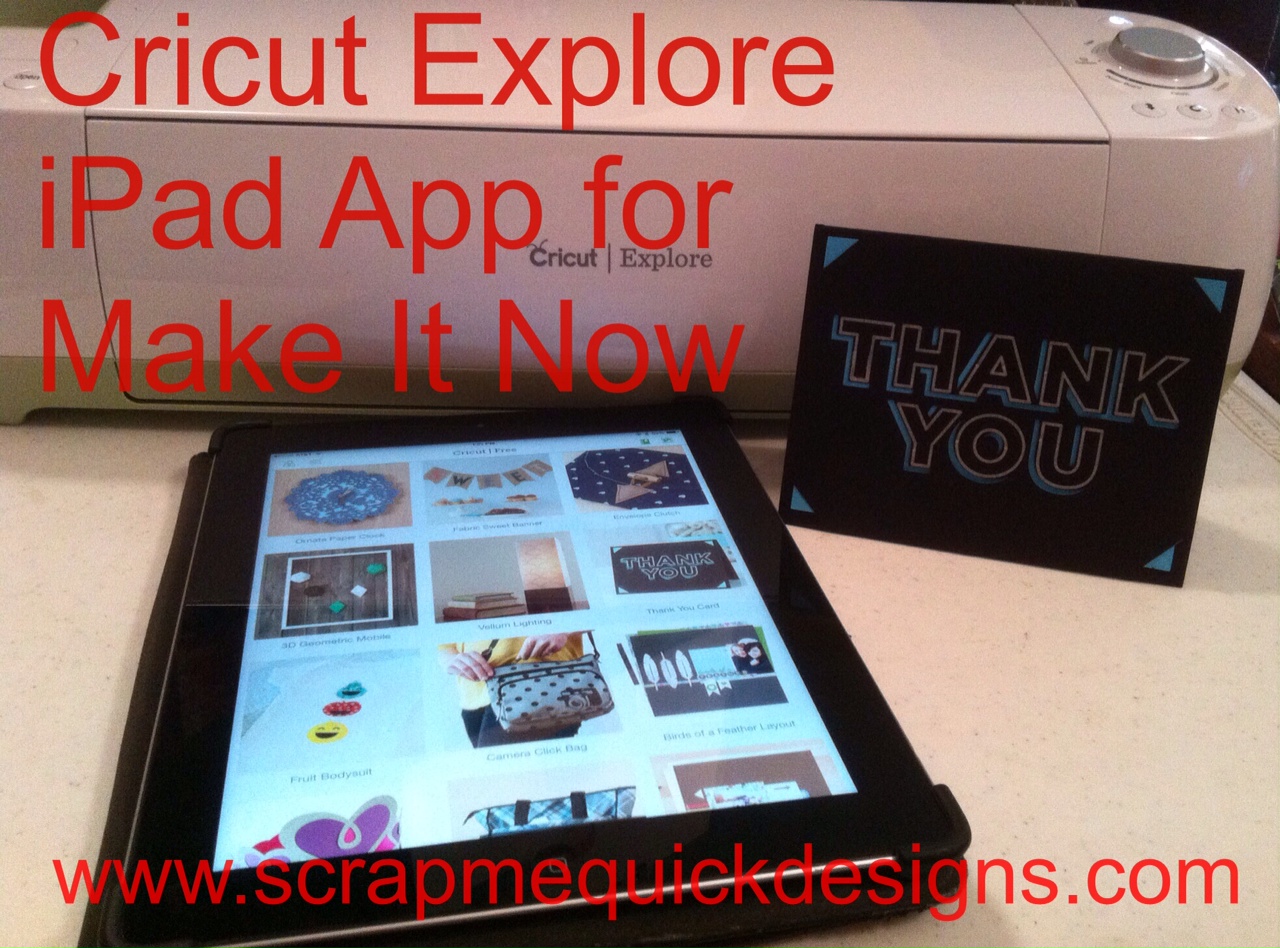
The much anticipated iPad app for the Cricut Explore has been released.  Yipee!  

Now remember, while you can use your iPad to cut with Cricut Explore there are a few things you need to know:

  • You MUST have the Cricut Explore Wireless Bluetooth Adapter sold separately at retail and online stores.

CE Bluetooth Adapter

  • The Cricut Explore iPad App is ONLY for using with the Cricut Design Space Make It Now Projects. Make It Now Projects are pre-designed projects perfect for the DIYer. They are already sized and ready to cut cut out of a variety of materials.
  • Your iPad MUST have Bluetooth capabilities…*iPad® 2 and newer; iOS7 and newer
  • If you have a Bluetooth adapter on your computer that is already paired with your Cricut Explore, you MUST disable it when you want to use with your iPad.  (This is just a simple disable step that you can then enable when you want to go back to using your computer Bluetooth so no worries there)

Lets see how you get the app and do a test cut to show you how the Cricut iPad App works.

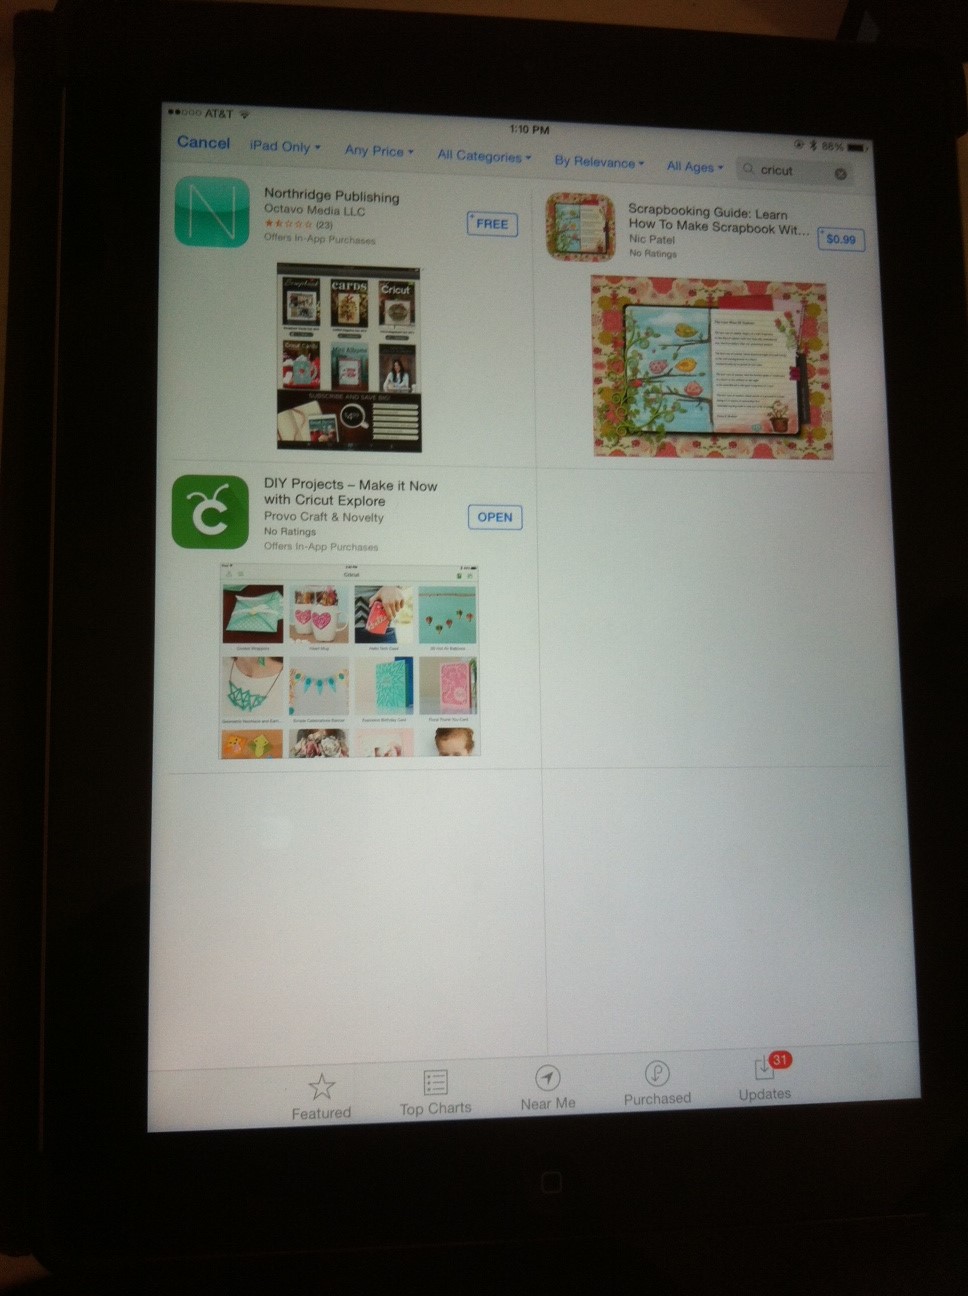
1. To find the app you need to go to the APP Store on your iPad and search for Cricut.  The app you want to download is the DIY Projects – Make It Now with Cricut Explore App (click this link to take you there).  Follow the usual process for downloading an app for your iPad.

ipad app search

2. Find the DIY Projects – Make It Now with Cricut Explore App on your iPad.  It is the cute green Cricut Bug Head.

cricut icon on ipad

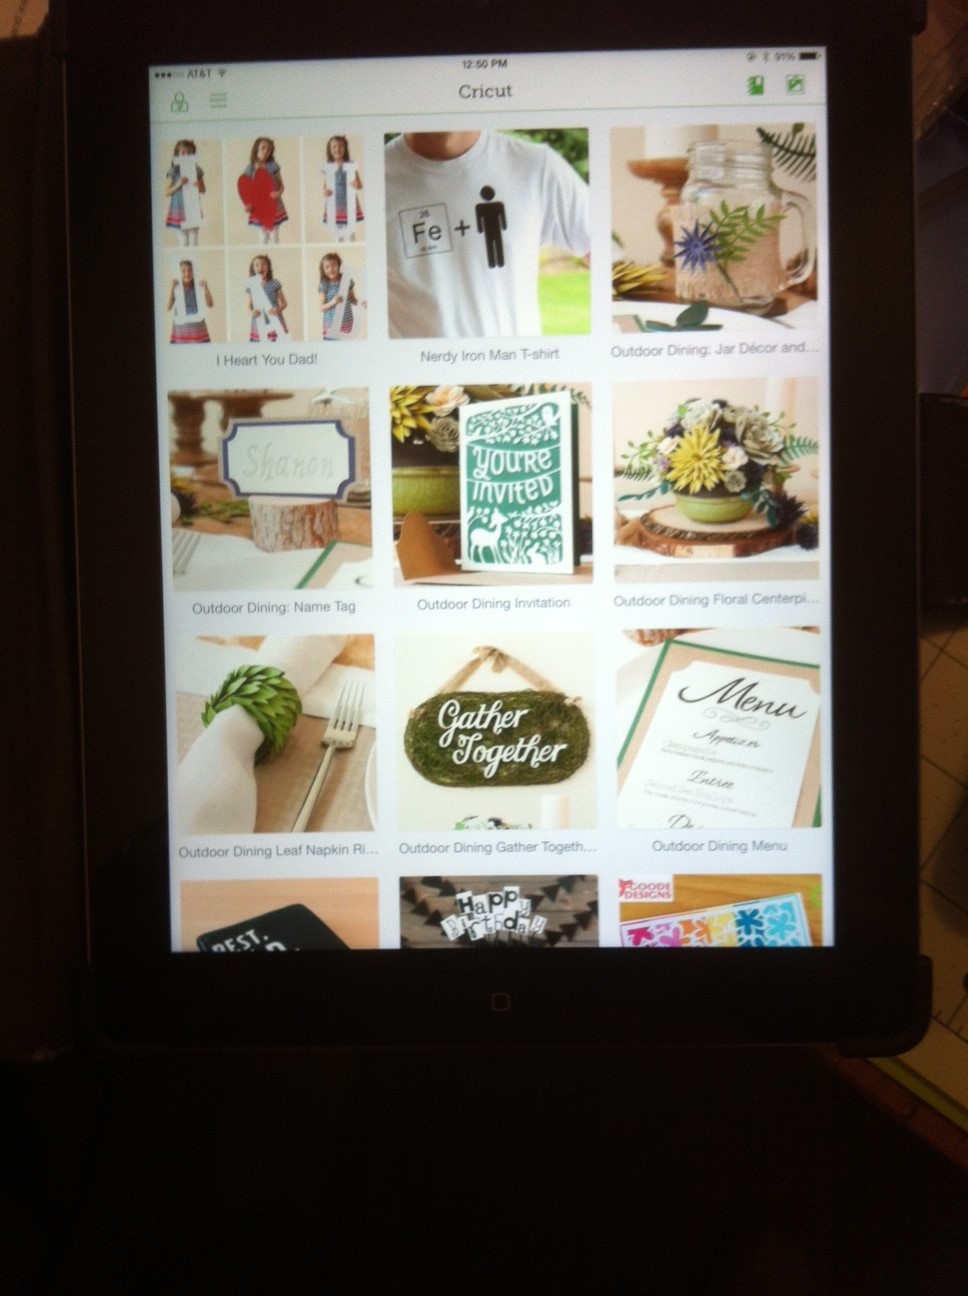
3.  Click the Cricut app to open it up. Now you will see the opening screen for Make It Now Projects in Cricut Design Space that you cut with your Cricut Explore machine.

Make it Now App open

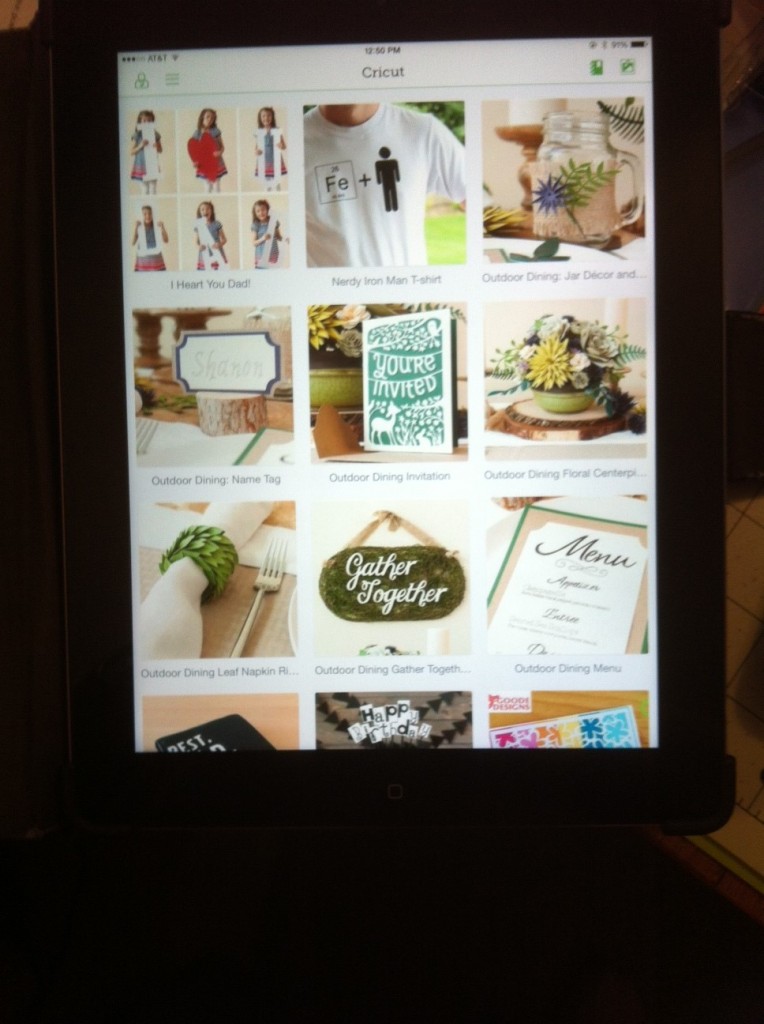
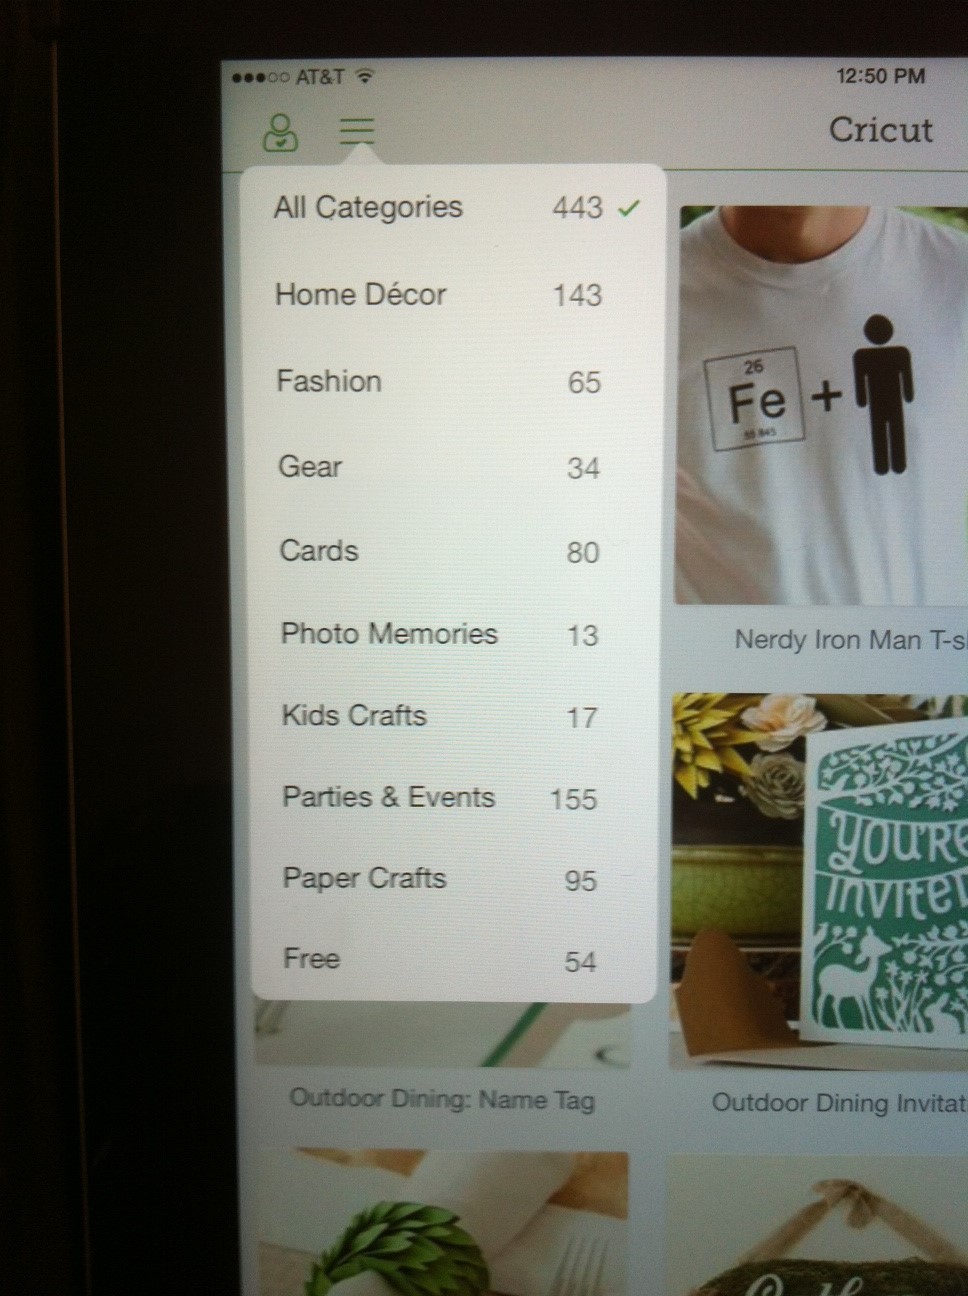
4. Across the top of the screen is a menu bar. If you click on the 3 horizontal lines it will open up the project categories. Note that there are currently (as of 6/5/2014) 433 Make It Now Projects Available.

Categories

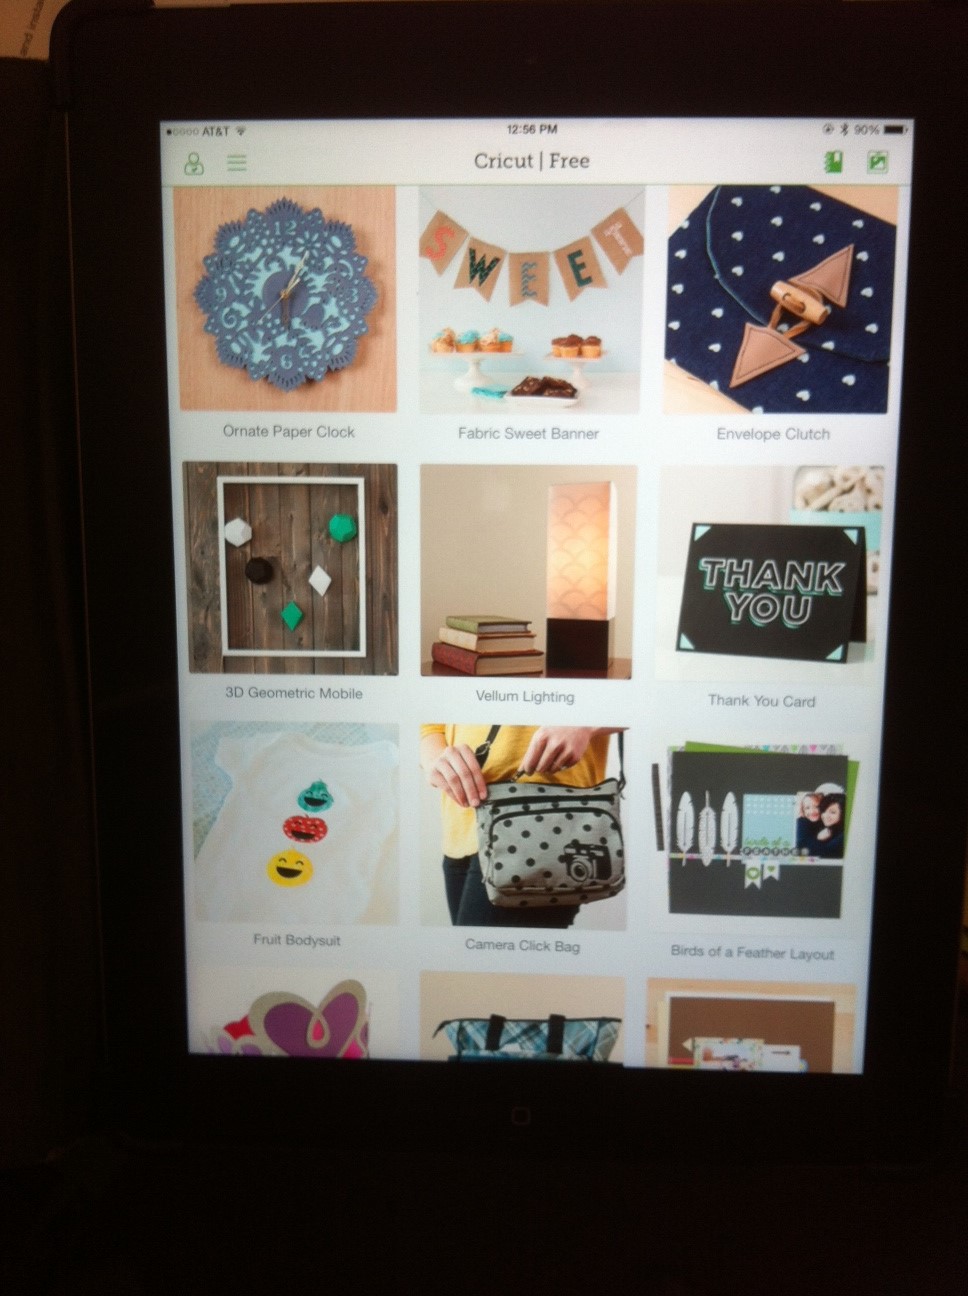
5.  I selected the FREE category to select a project to show you. I picked the Thank You Card since I had already made that and wanted to compare the process using the iPad app and using my computer.

Free Project screen

6.  Select the project you want to use and double click on it. It will open up project description just like it does in Cricut Design Space using your computer. To make the project, you click on the  upper right green Make It Now link.  (If the project costs money, it will show you that and open up a way for you to purchase.)

thank you card

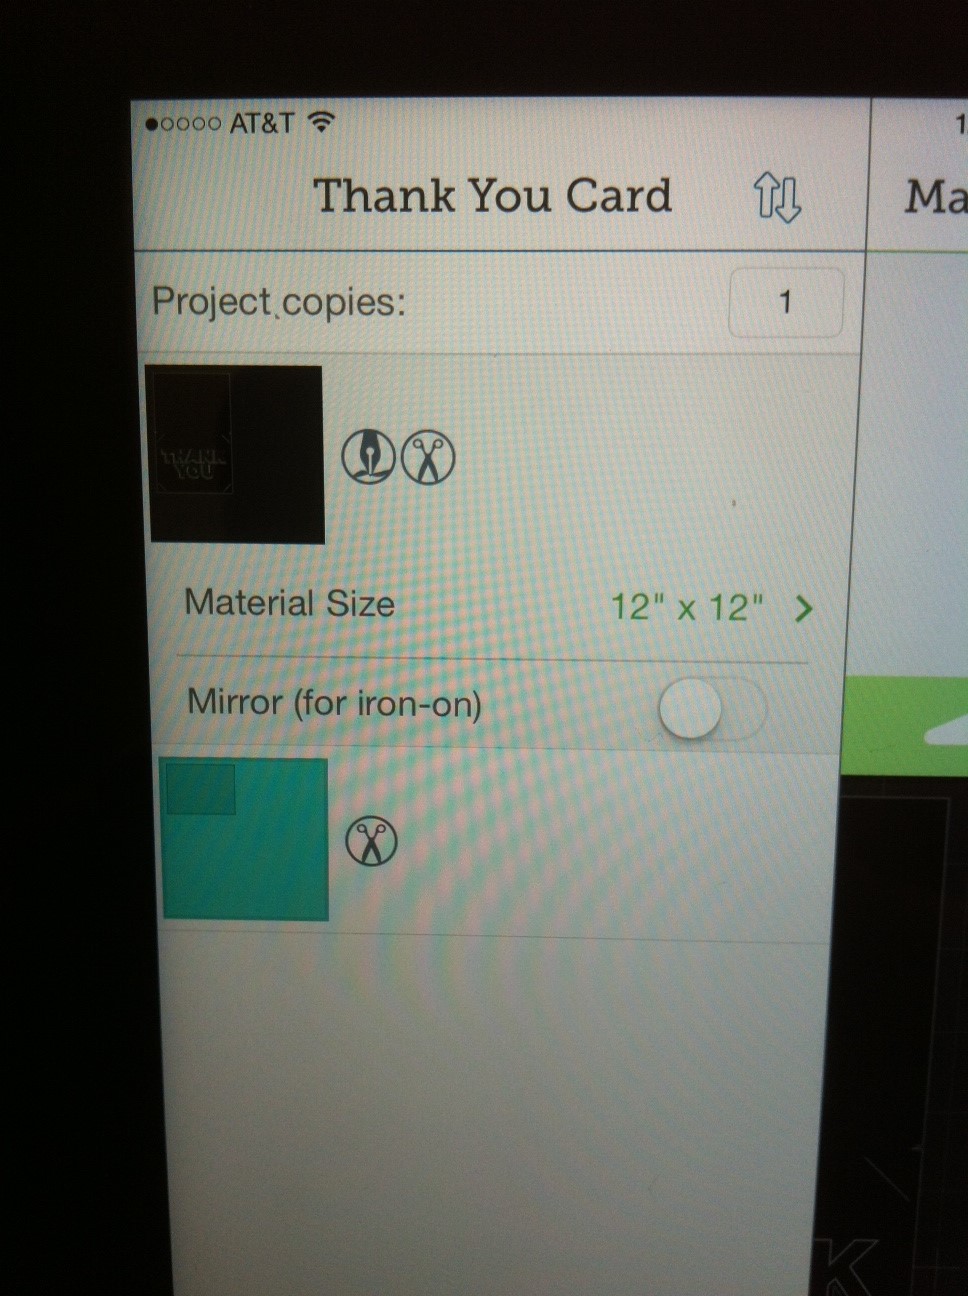
7. The project opens up and you see the Make It Now Project laid out automatically on the screen. A few things to notice here. *The arrows next to project name allow you to change the order of the mats which is nice. (However, once I changed it I could not get it to reverse the order). * Next to the words Project copies: you can enter the number of projects you want to make. * Next to MIRROR (for iron on) is a toggle switch to turn on and off.

Project on mat

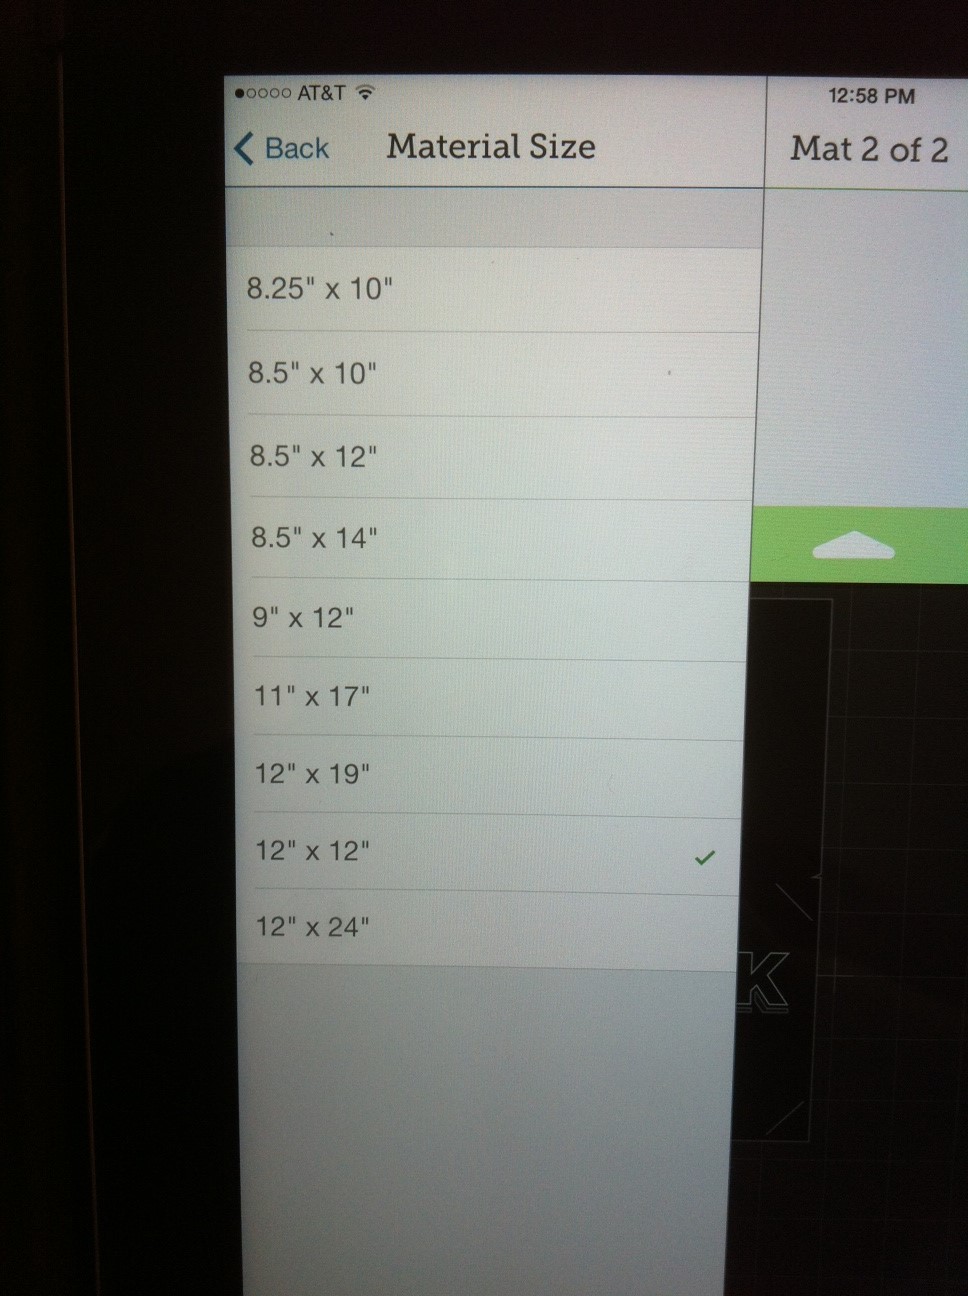
8. * Where it says Material Size, if you click on that pointer arrow, it opens up a sizing list.  ( I am assuming that some of these odd sizes are for material sizes used in other countries.)

material size

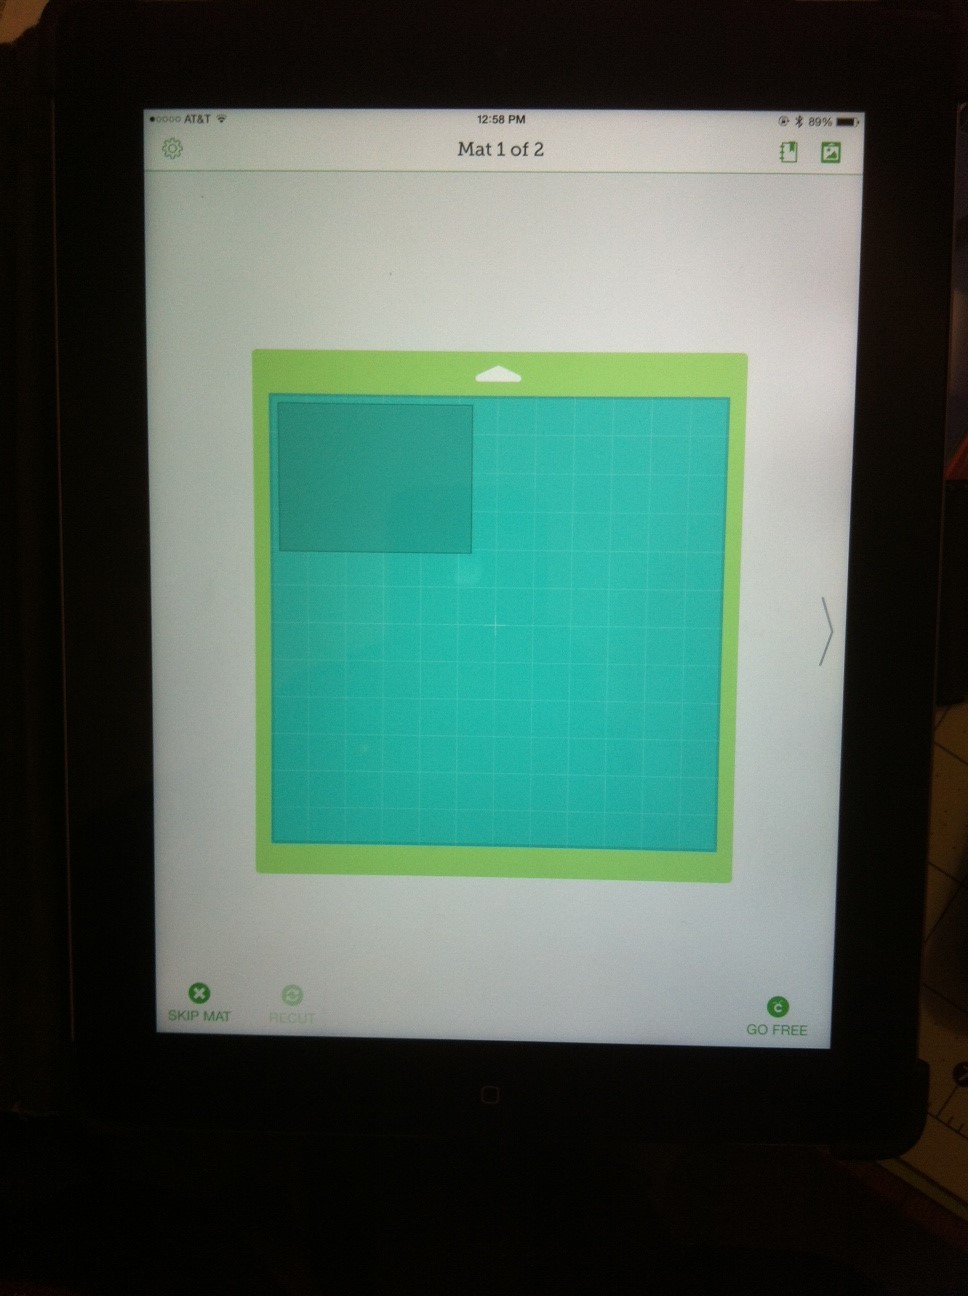
9. Tap on the larger mat to the right to open the mat and get ready to cut.

Project on mat

10. The first Mat opens up and at the lower right is the GO button. Click on that to start cutting process.

Mat 1

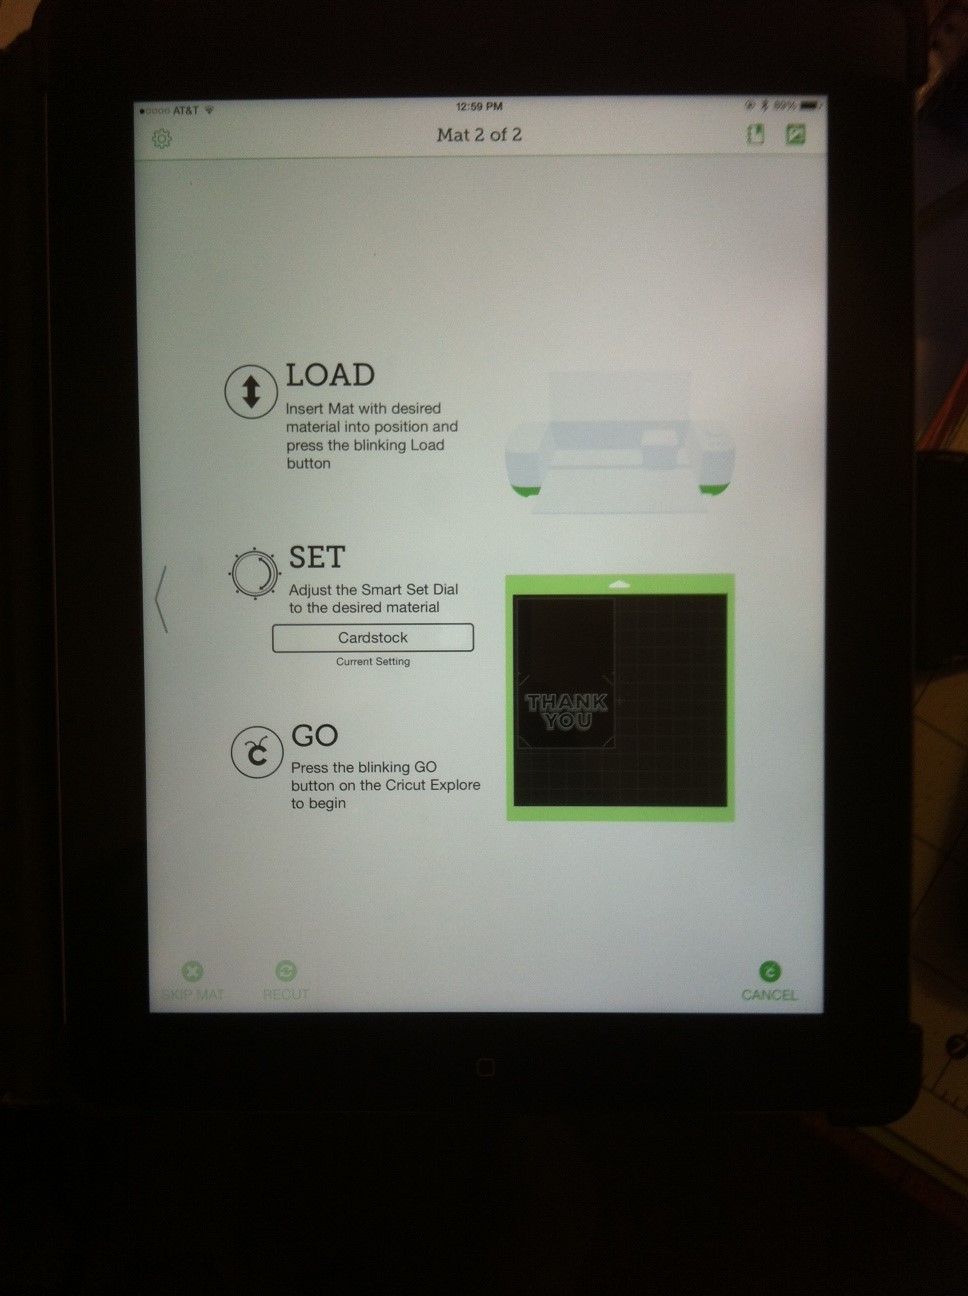
11. The normal Cutting Screen Opens up to prompt you to use LOAD, SET Smart Set Dial and GO button on your Cricut Explore machine. Follow along as you normally would with using your computer to cut out your project. The Cricut Explore button will light up as usual to prompt you.

cut screen

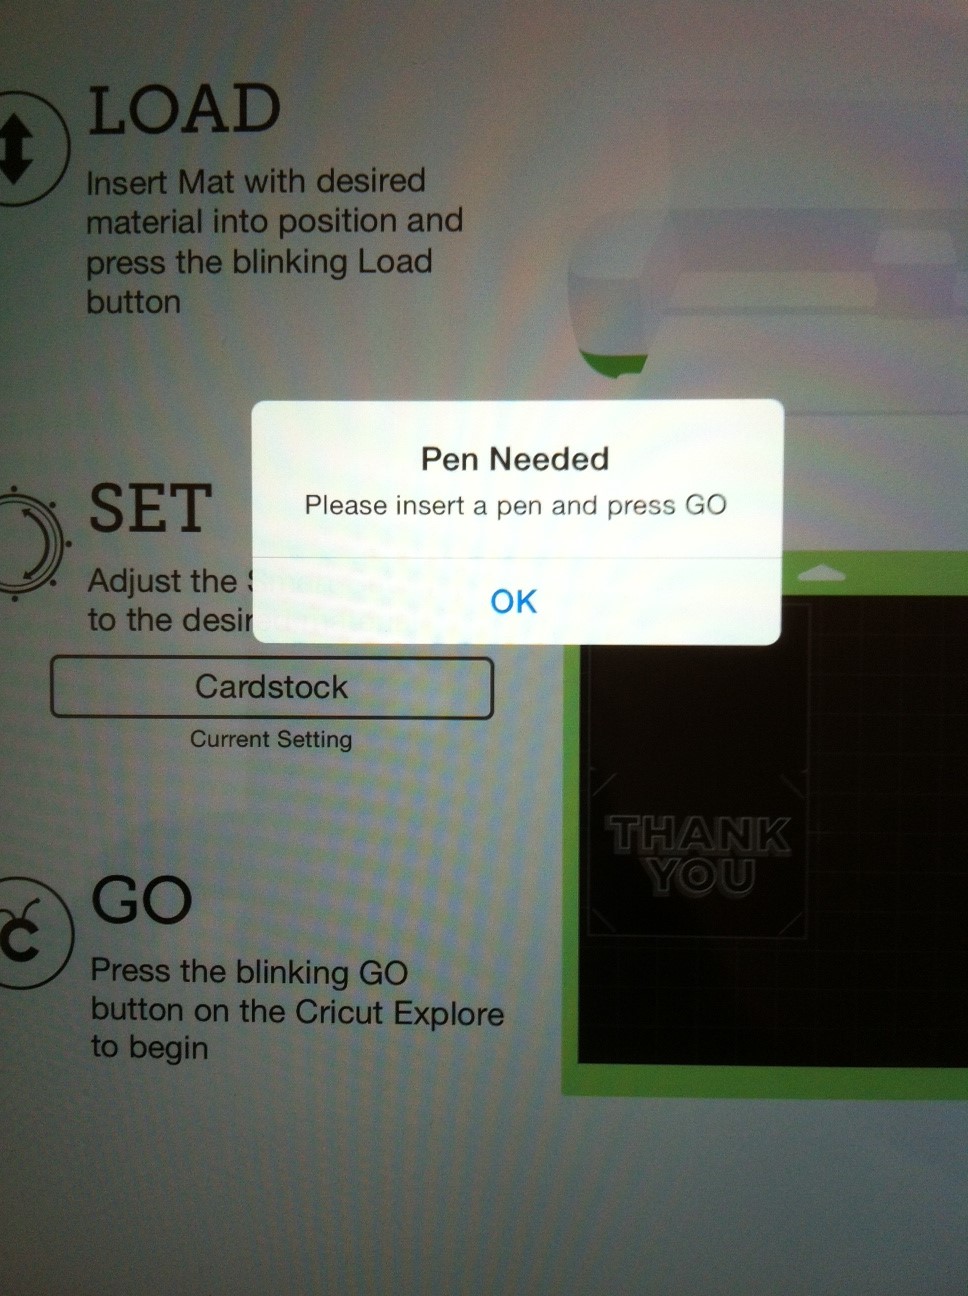
12. The iPad app even prompts you to put in the accessory you need for your project…a PEN or Score Tool.

Prompt for accessory

13. Here is the finished Thank You Card project. It cut out just like it would have from my computer with Cricut Explore and the Make It Now Projects.

completed thank you card

Now for my observations of the Cricut iPad App for Make It Now Projects:

PROS

  • It is super easy to use !
  • Glad to see it still prompts you to put in the accessory tool needed (pen or score tool)
  • The process worked really quickly as I progressed through each step
  • Easy purchase process if you select a project you need to pay for instead of the FREE ones

CONS

  • It does NOT have the option to Customize the Make It Now Project like it would if you used your computer with Cricut Design Space.
  • It requires me to disable my computer Bluetooth adapter to be able to link it with my iPad…this is just a slight hassle but worth mentioning. (It could be a limit of the Bluetooth technology and not Cricut related.) 

Overall opinion: I think it would be fun for those without computers to be able to cut the Make It Now Projects that are focused on DIY Projects but other than that, I see no real purpose for those of us with computers that are using Cricut Design Space with our Cricut Explore machine. Great job Provo Craft on getting this out there and easy to use !

Note:  At the present time, Provo Craft has not announced if the app will be made available for android devices.  Or if you will ever be able to use other Cricut images to cut besides the Make It Now Projects.

Join us over at Lets Learn Cricut Explore Facebook group (click on link to go there) as we have fun sharing and learning more about Cricut Explore.

Wanna Join?

We’re back and looking for new faces to join the Die Cut Crazy team! Come join the fun. 🙂 

dcc contrib.


Charisma Meets DCC Blog Hop

Charisma&DCC

Welcome to the Charisma Cardz Meets Die Cut Crazy Special Challenge & Blog Hop. Our Wonderful design team have this week teamed up with the wonderful Magazine Die Cut Crazy to bring you some wonderful inspiration from the world of Die Cutting and also a fab packed April Edition which is available for download on all IOS Apple Devices via the Newstand & in PDF format from the website! Our designers have made some wonderful Easter and Spring projects to inspire your own crafting with your die cuts.

This week at Charisma we have an ‘ANYTHING GOES’ Challenge where you can join in by linking or emailing charisma with your cards/designs and of course as always there are some fabuolous prizes to be won which the winners will be announced next week on the blog and featured in next months issue of Die Cut Crazy.

As well as this we have a fabulous blog hop show casing all the designers which you should have a look around! And for each comment you leave at each stop we’ll be drawing some random winners for prizes!

If you just joined our hop, be sure and go back to the Charisma Cardz Challenge Blog to start from the beginning!


Garden Project

At the moment here in Australia, the weather is hot and humid even though now we are into autumn. Our summer has been extremely hot, so it will be great to have some cooler weather.

My Garden Project displays the beautiful colours that summer and autumn can bring for us.

Screen Shot 2014-04-02 at 1.41.08 AM Screen Shot 2014-04-02 at 1.41.18 AM

Materials used

•Cardstock – white, light blue
Dies – wheel barrow, roses – JOANNA SHEEN

            Tree – MARIANNE DESIGNS

            Lattice – SPELLBINDERS

            Flowers – EZCUT & COUTURE

            Cloud – EZCUT

            Bookmark – EZCUT

•Alcohol Markers – browns, greens, greys, yellow, pink, purple, reds, blue
Ribbons – green, silver star, bright blue
•Diamontees

How I put these together

Card:

  1. Cut white card.
  2. Cut light blue cardstock. Cut green ribbon and attach to blue cardstock at bottom. Cut silver star cardstock and attach to blue cardstock at top. Using Double-sided tape adhere the blue cardstock to the white card.
  3. Cut lattice from white cardstock and attach to the blue cardstock.
  4. Cut tree, wheelbarrow, cloud, roses and flowers from white cardstock and colour as desired with alcohol markers.
  5. 3D tree onto the right side of the white lattice.
  6. Arrange roses and flowers into wheelbarrow and 3D onto white lattice having part of the wheelbarrow in front of the tree.
  7. 3D cloud at top left hand side of lattice.
  8. Glitter as desired
  9. Bookmark
  10. Cut bookmark from light blue cardstock. Glue onto white cardstock and cut around to form a border of white. Round off corners on white cardstock
  11. Cut lattice from white cardstock and size to fit middle portion of bookmark. Glue lattice piece to light blue cardstock
  12. Cut roses from white cardstock. Colour with alcohol markers. Glue to lattice
  13. Cut hole at top of bookmark. Attach bright blue ribbon
  14. Glitter as desired

Screen Shot 2014-04-02 at 1.40.31 AM

Gift Tag:

  1. Cut one end of bookmark from light blue cardstock. Glue onto white cardstock and cut around to form a border of white. Round off bottom corners on white cardstock
  2. Cut lattice from white cardstock and size to fit middle portion of bookmark. Glue lattice piece to light blue cardstock
  3. Cut one rose from white cardstock. Colour with alcohol markers. Glue to lattice
  4. Cut hole at top of bookmark. Attach bright blue ribbon
  5. Glitter as desired

Dianne from Grayson Creations Handmade Cards

Blog address: graysoncreationscards.blogspot.com.au

www.facebook.com/pages/Graysoncreations-handmade-cards


Thanks for stopping by the Charisma Cardz Meets Die Cut Crazy Magazine Blog Hop & Challenge . I hope my project inspires you to create your own Spring/Easter project.  Please leave a comment to let me know you stopped by. Next up in the hop is Anna Bradshaw- craftwithanna.blogspot.com

  If you just joined the hop, here is a list of designers so you don’t miss any:

Charisma – www.charismacardz.blogspot.com
Carlyann – www.sweetncrafty.blogspot.com

Emma Pountney – http://tinyurl.com/m42q998

Sarah sw – www.sarahshandmadecardsx.blogspot.co.uk

Mandy – www.mandysparkles.blogspot.com

Marie – www.cardmakingmazza.blogspot.co.uk

Jo  – www.determinedcrafter.blogspot.co.uk

Vee- www.bearykrafti.blogspot.com

Susan – www.mixamatoasties.blogspot.co.uk

Die cut crazy facebook page – https://www.facebook.com/pages/Die-Cut-Crazy-Magazine/552327878152647?ref=ts&fref=ts

Lorraine – www.travellingcolours.com

Emma – www.emgoescardmaking.blogspot.co.uk

Tina – www.tinamarie997.blogspot.co.uk

Dianne Grayson – You are here!! 🙂

Anna Bradshaw – www.craftwithanna.blogspot.com

Eemeli – www.eemelike.blogspot.com

Stacey – http://www. lasatas.blogspot.co.uk/

Natalie – http://ngcards.blogspot.co.uk

We have a Winner and a New Sketch!

page89.009page89.008